Icon Icon Icon Follow Me on Pinterest YouTube Icon

Rabu, 18 Februari 2015

How to Set Up Your Shiny New iPhone 6 or iPhone 6 Plus

How to Set Up Your Shiny New iPhone 6 or iPhone 6 Plus
Hey, you got a new phone! Not just any phone, but one that compels otherwise sane people to wait outside in line for hours, dayssometimes weeks.
Whatever you did to get that new iPhone, it will be all for nothing if you don’t set it up correctly. Below is a guide to prepping your iPhone 6 or 6 Plus, for both first-time owners and i-device veterans.
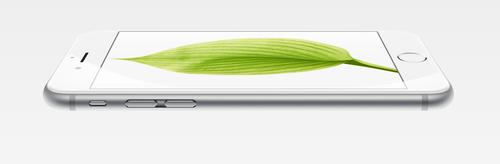
1. It’s aliiive.After you’ve gone through whatever detailed unpacking ritual you’re into, you’ll need to turn on the phone. In previous models, that would require you to press a button on the top right, but both iPhone 6 phones now sport that button on their upper-right sides. Hold it until the screen lights up and you see the Apple symbol.
iPhone 6 sleep/power button
(Apple)
2. The basics.You’ll be greeted by iOS’s dry but helpful Setup Assistant. It’ll ask you to choose a language, connect to a WiFi network, and sign in to iCloud. If you do not already have an iCloud account, you’ll have to create one. Sorry, but there’s no convenient way around this.
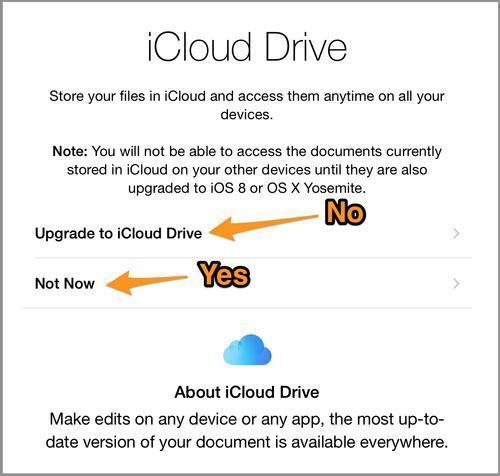
Speaking of iCloud, Apple is upgrading to a new storage system it calls iCloud Drive. It’s supposedly going to be much better, but it’s not ready yet. If given a choice, I’d refrain from upgrading for now.
iCloud Drive screenshot
Why isn’t it working yet? Apple has engineered iCloud Drive to be compatible with only the most updated software on all your devices. That means iOS 8 on your mobile devices and OS X Yosemite on your Mac.
But Apple is behind on releasing Yosemite, and it likely won’t be out until mid-October. So if you upgrade to iCloud Drive, you won’t be able to access your cloud files on your desktop.
Long story short, select Not Now.
3. Give it life.
Previous iPhone, iPad, or iPod ownersIf you’ve owned an iPhone and backed it up with an existing iCloud account in the past, you can import all your settings, contacts, apps, photos, and other content. Just be sure to back that data up via iTunes or iCloud before you make the transfer.
To sync via the Lightning cable, make sure you’ve downloaded the latest version of iTunes, and then select Restore from iTunes Backup. It should start syncing after you connect your phone.
To sync wirelessly, make sure you connect to WiFi during setup and choose Restore from iCloud Backup.
New iPhone usersIf you’ve never used an iPhone before, select Set Up as New iPhone. If you’ve somehow managed to never use iTunes either, I’m very impressed. You can download it here, and throw all the song and movie files you want on your phone into the application.
Depending on the amount of memory you purchased for your phone, you won’t be able to load it with every last cat photo and Grateful Dead track you’ve accumulated on your computer’s hard drive. But don’t worry; you can still have millions of songs at your fingertips by subscribing to streaming services like Beats, Rdio, or Spotify that work directly on your phone. You’ll also be able to store excess photos and documents in iCloud or other cloud-based storage systems like Dropbox.
Ideally, you should save some elbow room on the device for new apps and all the photos and videos you’ll be taking with your tricked-out camera.
4. Lock it down.The iPhone you’re handling will soon be the home of your most private communications: account passwords, candid text conversations, gossipy work emails, and maybe even a nude photo or two. That’s why you should take every precaution possible to secure it.
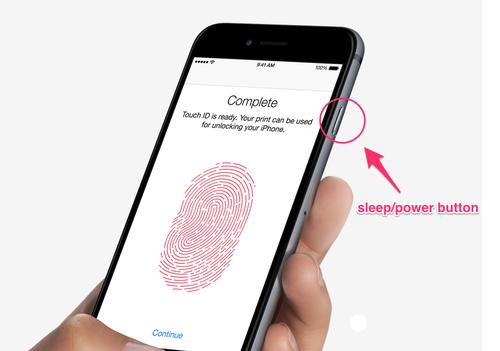
The first thing to do is activate Touch ID. During setup, you’ll be prompted to enable it, and the screen will then instruct you to place a finger on the home button over and over again at different angles. It will then take photo after photo of your fingerprint, until you’re finally done.
GIF of Touch ID setup
You can add more fingers or additional people/pets by visiting the Settings app, scrolling down, and selecting Touch ID & Passcode Add a Fingerprint.
If you choose to forgo Touch ID, at the very least lock your home screen when you’re offered the chance. Otherwise, you will hate yourself the second you realize you left your phone at the Starbucks across town.
5. Bring your friends.The process of transferring your contacts from an old phone to your new phone will vary in difficulty, depending on how long you’ve waited to upgrade.
Oftentimes, your personal mobile carrier will offer guidance in this department, but there are still a few ways you can fill in your address book without its help.
For instance, if you’re using a Mac, you can load your current contacts by plugging in your phone, selecting it in iTunes, clicking Info, and selecting Sync Address Book Contacts.
If the SIM card from your old phone is compatible with the iPhone 6, slip it in, restart it, and then go to Settings Mail, Contacts, Calendars. All the contact information will be transferred. Even if your SIM card doesn’t fit, you can still tap that option to import contacts from your personal and work email accounts.
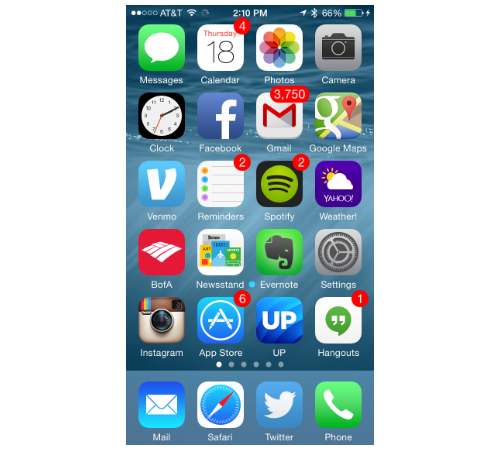
6. Clean that screen.Part of buying an iPhone 6 is welcoming the phone’s latest operating system, iOS 8. And part of welcoming iOS 8 is managing its clutter. Apple’s operating systems are notorious for pushing a select number of Apple-made apps that you’re blocked from deleting. You can, however, hide them away forever in an obscure folder. Here’s how:
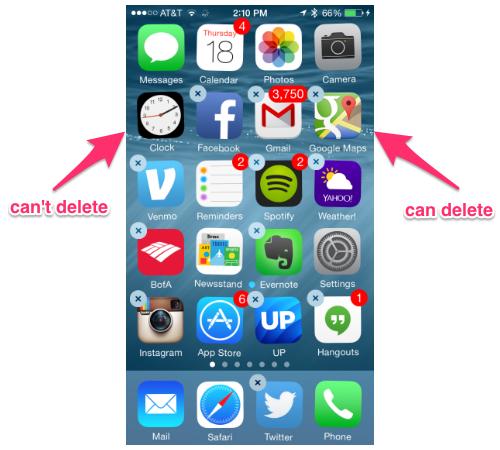
When you see an app that you’d like to hide — for instance, Reminders — hold your finger down on its icon.
iPhone 6 Home screen
All the apps on your screen will begin to wiggle. You’ll notice that the ones you can delete will sprout Xes in their upper-right corners. Those you cannot delete will just mockingly wiggle in your face.
iPhone 6 Home screen with icons ready to be deleted
Keep your finger down on the app you’re going to hide and begin to drag. You have one of two options: You can either pull it off the home screen to the right and move it to a less frequently visited back page or move it on top of another similarly useless app, which will create a folder.
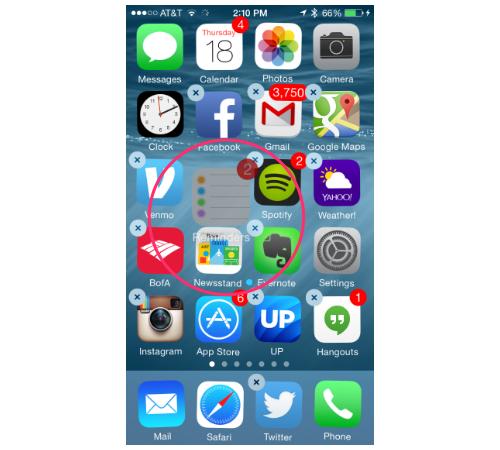
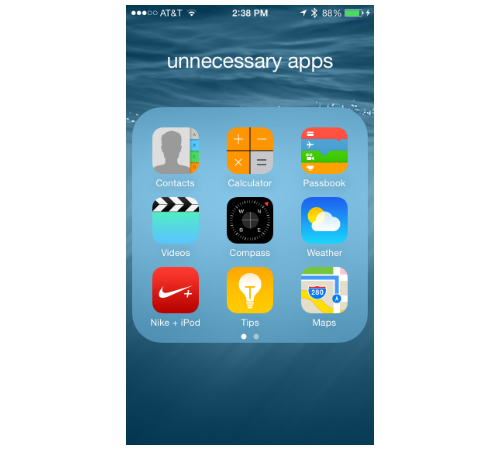
iPhone 6 Home screen
When you move one app into another, iOS will automatically evaluate the properties of the two apps and populate a title, like so:
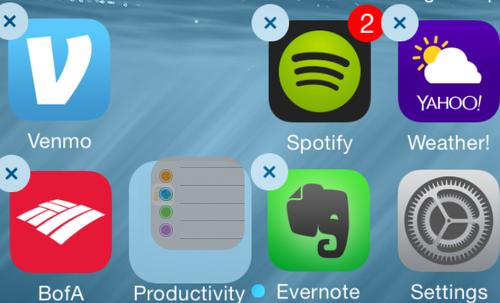
iPhone 6 Home screen
Once you’re in the folder, however, you can title it whatever you want. For instance, here’s my folder full of un-deletable Apple apps:
iPhone 6 apps in a folder
Choosing which un-deletable apps should be buried in a folder is a personal thing, but take it from me, the woman whose job it is to test apps: Most of the Apple-made stuff is not as good as other, often free, alternatives in the App Store. You can check out Yahoo Tech’s full list of recommended starter apps here.
7. Save your battery.iOS 8 still comes with that silent but deadly visual feature called parallax, a technology that creates a foreground and background motion as your line of sight changes. It’s also a major battery drain. Turn it off by going to Settings General Accessibility Reduce Motion and turn Reduce Motion On.
8. Nesting.You’ve nailed the basics; now it’s time to get comfortable.
iOS 8 comes with the ability to install third-party keyboards on your phone. This will hopefully ameliorate any autocorrect nightmares you’ve 
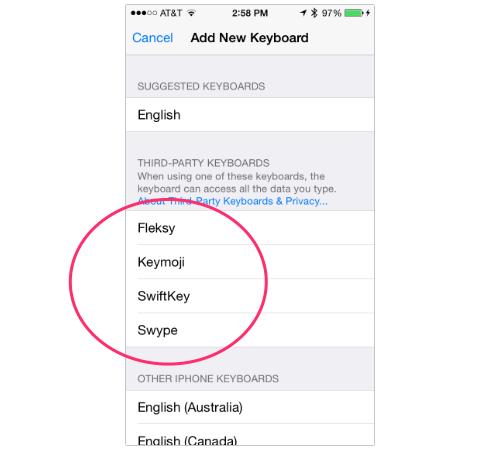
encountered in your past. Try SwiftKey (free), Swype (99 cents), or Fleksy (99 cents) for starters.
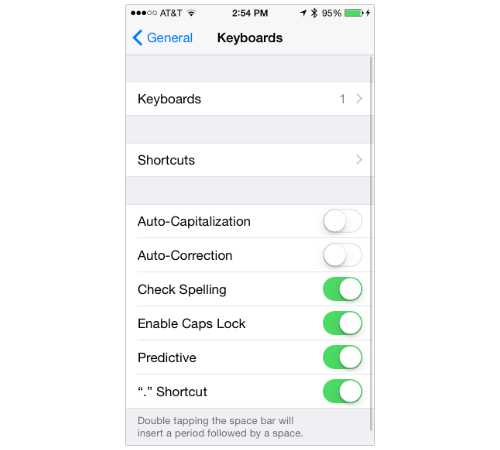
Once you’ve downloaded these apps, go to Settings General → Keyboard.
iPhone Keyboard settings screen
Select Add New Keyboard. Two types of options will pop up: third-party keyboards and Apple-made keyboards. Select whichever you want.
iPhone Keyboard settings screen
(While you’re at it, install the Emoji keyboard under Other iPhone Keyboards. You’re going to want to have access to emoji, those cute little cartoon figures you see everywhere. Trust me.)
Once you tap the name of your preferred third-party keyboard, it’ll automatically be installed. But you’re not done yet.
You’ll need to tap its name again and select Allow Full Access.
Allow Full Access option
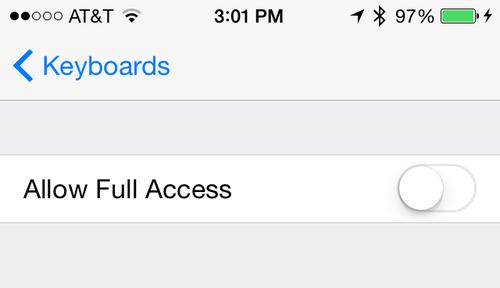
This basically allows the third-party-keyboard to analyze and make predictions based on the text you enter.
To edit the order in which these keyboards appear, backtrack to Keyboards and tap the Edit button in the upper-right corner.
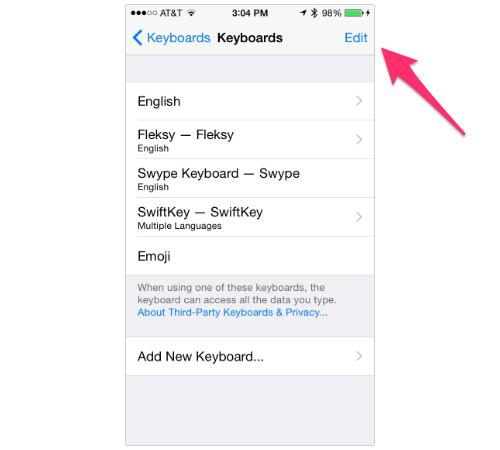
iPhone Keyboard settings screen
From there you can select and drag the keyboards around by holding your finger down on the three lines to the right of each title.
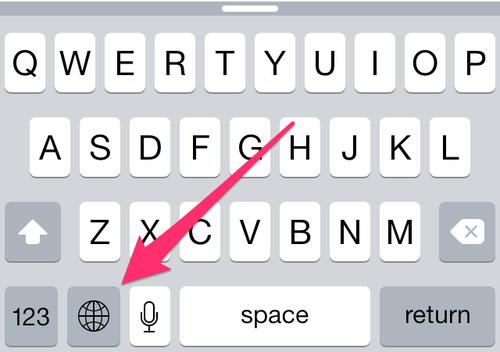
iPhone Keyboard settings screen
Finally, when you’re using your keyboard, you can switch to others by tapping the globe in the bottom-right corner of the screen.
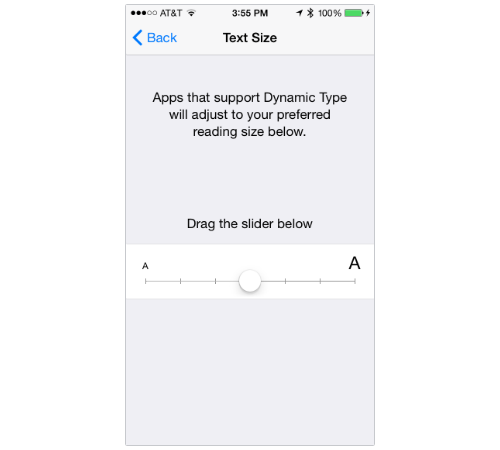
iPhone keyboard
If you have horrible eyesight, like pretty much everyone who has been sentenced to stare at glowing screens their whole adult lives, you may want to adjust the text size on your phone.
To do that, you can go to Settings General → Text Size. There, you can drag a slider left or right to minimize or maximize the text on your iPhone’s screen.
iPhone Text Size setting
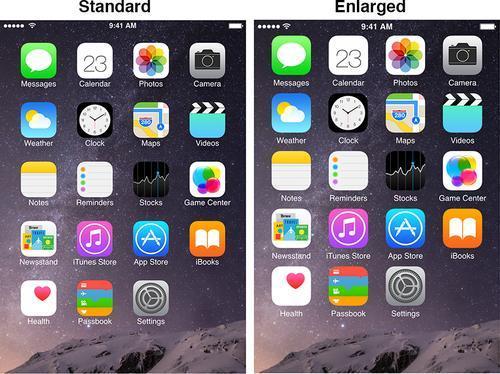
Any 6 Plus owners out there will also have the ability to enlarge the graphics on the screen in Settings. Here’s what the difference will look like.
iPhone 6 home screen in standard and enlarged modes
9. Get a buzz.Adjust your phone’s ringtone and vibrations in Settings Sounds.
iPhone Sounds settings
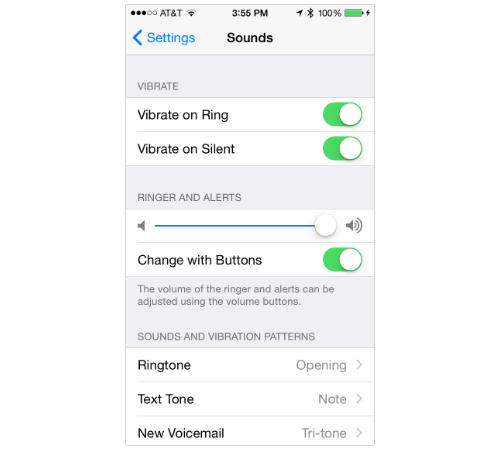
Here you can customize every notification under the sun, from text messages to tweets. You can even make your own phone vibration.
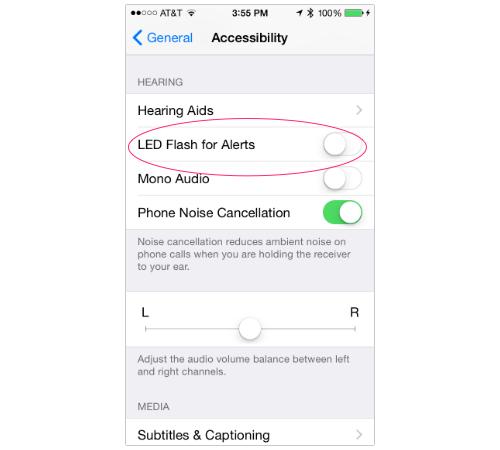
If you’re more of a visual person, you can make a bright light blink every time you get a new notification by going to Settings → General → Accessibility → LED Flash for Alerts. And, remember, you can always turn your phone to vibrate by flipping the switch located on the upper left of the phone itself.
iPhone accessibility settings
That’s about it! Now run free, my pretties, and start snapping selfies. We all know that’s the main thing you’ll use this phone for anyway!
Read More

LG G Pad 8.3 Edisi Google Play Dapatkan Update Android 5.0 Lollipop

Kabar gembira bagi para pengguna tablet LG G Pad 8.3 edisi Google Play (GPE). Google dan LG baru saja merilis update Android 5.0 Lollipop untuk tablet berlayar 8,3 inch ini.
Seperti update Lollipop pada umumnya, update Lollipop untuk LG G Pad 8.3 GPE ini membawa berbagai perbaikan performa, perbaikan kestabilan, peningkatan daya tahan baterai, serta penambahan berbagai fitur-fitur menarik yang tentunya sayang jika dilewatkan. Sebut saja kehadiran Material Design ala Lollipop, lockscreen dan notifikasi yang lebih menarik, dan berbagai fitur-fitur baru lainnya.
Jika tablet G Pad 8.3 milik anda belum mendapatkan notifikasi update ke Android 5.0 Lollipop ini, anda bisa coba untuk mengecek ketersediaan update ini secara manual lewat menu Settings > About phone > System updates > Check now
Read More

Tutorial Flash Ulang Samsung Galaxy Note 1

Sebelum kita membahas Cara Install Ulang/ Flashing Samsung Galaxy Note 1 N7000 Sebaiknya kita persiapkan dulu alat perangnya supaya Install Ulang/ Flashing Samsung Galaxy Note 1 N7000 bisa berjalan dengan lancar. 

Perlengkapan yang diperlukan Install Ulang/ Flashing Samsung Galaxy Note 1 N7000 :
1. HP Samsung Galaxy Note 1 N7000
2. Kabel Data 
3. Odin 3.7 , Download Klik Disini
4. Firmware Samsung Galaxy Note 1 N7000, Download Di situs Resminya samfirmware.com
5. Driver USB ( jika perangkat tidak bisa terhubung ke komputer) Download Klik Disini

Jika semua Alat Perang sudah di siapkan sekarang kita masuk ke  Cara Install Ulang/ Flashing Samsung Galaxy Note 1 N7000, Ikuti Langkah dibawah ini :

1. Buka dan Extract Odin 1.85 dan Firmware Samsung Galaxy Note 1 N7000 Yang sudah di download ,

2. Matikan HP Samsung Galaxy Note 1 N7000, kemudian hidupkan ulang  dengan cara menekan tombol (volume bawah + home + power) secara bersamaan . setelah itu akan ada notifikasi untuk masuk ke mode "download", kemudian tekan tombol "volume atas/up". nanti akan muncul seperti gambar dibawah ini 
(Ini Gambar Samsung Galaxy Core , sebagai Conohnya saja karena caranya sama)


3. Buka Aplikasi Odin  dan Hubungkan Smart Phone Samsung Galaxy Note 1 N7000 dengan kabel Data ke Komputer kemudian jika berhasil tersambung akan tampil seperti gambar dibawah ini , Jika tidak coba ulangi beberapa kali .
4. Kemudian klik "PDA" dan pilih firmware  yang sudah di extract tadi "S7270XXUAMFC_S7270OLBAMF6_S7270XXUAMF5_HOME.tar.md5" yang sudah kalian estrak. ceklis bagian "auto-reboot" dan "f. reset time".

5. Jika langkah yang diatas sudah dilakukan , Sekarang tinggal KLIK Start dan tunggu Prosesnya sampai selesai 

6. ketika prosesnya selesai, Nanti akan muncul Tulisan "pass" dalam kotak bewarja hijau. dan kemudian HP anda akan restart secara otomatis 

7. Langkah terakhir adalah  Selesai hehe  :D . Perangkat anda sudah bisa digunakan kembali
SUMBER disini
Read More

Cara Pasang CWM Di Sony Xperia J ICS dan JB


OK.. Langsung saja download dulu bahan - bahan nya !!
Flashtool Disini
CWM XJ Disini
Kernel JB 31 Disini
Kernel ICS 75 Disini
 Langkah eksekusi 

1. Instal Flashtool yang sudah di download tadi, Instal juga Flashtool-drivers yang letaknya ada di Local disk C / Flashtool / Drivers / Disini

2. Extract CWM XJ (pass : an21droid.blogspot.com), Taruh di Local disk C / Flashtool / Fimwares / Disini 

3. Extract Kernel JB/ICS (sesuai FW agan), Taruh di Local disk C / Flashtool / Fimwares / Disini ma
4. Matikan XJ agan, Masuk ke Fastboot mode dengan cara menekan tombol volume up lalu sambungkan XJ ke laptop dengan kabel USB (led biru menyala tanda sudah berhasil masuk fastboot mode).

5. Buka Flashtool, Klik lambang petir seperti pada gambar

6. Pilih fastboot mode seperti pada gambar, Klik OK 

7. Pilih select kernel to flash seperti pada gambar
8. Pilih fimwares / cwm-xj, lalu klik open, Lihat gambar 


9. Jika sukses akan ada pemeritahuan 'OKAY' di jendela flashtool nya, Lihat gambar


10. Cabut XJ dari kabel usb, Hidupkan XJ, Saat led ungu menyala tekan volume up berulang - ulang sampai masuk ke CWM nya, silahkan lakukan aktifitas yang agan perlukan, Setelah selesai, cabut batre XJ, Tunggu beberapa saat, Pasang kembali, Ulangi langkah ke 4 s/d 8, di langkah ke 8 pilih Kernel.sin JB/ICS (sesuai FW), jangan pilih CWM-XJ, klik 'open' tunggu sampai ada pemberitahuan 'OKAY' cabut XJ dari USB, hidupkan... ENJOYY... ;)
Not : Saya tidak akan bertanggung jawab bila terjadi apa - apa dengan HH agan, DWIYOR !!


Tested BY me


Thanks to Official Group Sony Xperia J Indonesia
Read More

Cara memperbaiki Acer Aspire One yang Tidak Mau Start


Acer Aspire One D255Aduh Mak!, Iseng2 nyoba booting pake Flashdisk ke Acer Aspire One (AA1), tiba tiba netbook gue ngga mau booting, layar kosong pas dihidupin, terus komputer ngga mau padam walaupun dah menekan tombol power lebih dari 10 detik, Puyeng gue, iseng2 nanya sama paman google tentang masalah AA1 yang ngga mau booting, nah ketemu nih tutornya, berikut hasil copas nya:
Beruntung ternyata netbook Acer Aspire one (AA1) mempunya fitur built-in recovery BIOS/CMOS, jadi kita bisa mengupdate/menulis kembali BIOS/CMOS nya walaupun komputernya tidak mau tampil sama sekali, komputernya masih bisa hidup tapi tidak ada tampilan apapun dilayar!, dan sedihnya sudah divonis “Rusak parah” karena harus mengganti mainboardnya, kt teman gue.
Langkah langkah memperbaiki netbook Acer yang rusak:
  1. Siapkan sebuah flashdisk yang diformat memakai partisi FAT.
  2. Download/unduh BIOS terbaru di websitenya Acer dan masukkan file FLASHIT.EXE dan file biosnya kedalam flashdisk kita kemudian ganti nama file BIOSnya menjadi ZG5IA32.FD
  3. Matikan AA1 kesayangan kita (cabut batere dan adaptornya).
  4. Pasang kembali baterai dan adaptornya juga flashdisk yang telah kita masukkan 2file tadi, kemudian tekan tombol keyboard Fn+Esc ( Tombol Fn dan tombol Esc ditekan bersamaan) kemudian hidupkan AA1 kesayangan kita (Tekan tombol Power)
  5. Lepas penekanan pada tombol Fn+Esc setelah beberapa detik (5 detik kira2) dan perhatikan lampu di tombol powernya akan berkedip kedip
  6. Tekan Tombol Power sekali lagi, Sekarang netbook AA1 kesayangan kita akan mulai mengupdate/menulis kembali BIOS/CMOS melalui flashdisk
Tunggulah sampai prosesnya selesai, dan jangan melakukan apapun pd AA1, perhatikan lampu LED di tombol power akan berkedip-kedip, kemudian setelah prosesnya selesai netbook AA1 kita akan reboot otomatis. harap bersabar yah.
Catatan: Jika dalam melakukan langkah2 diatas terjadi kesalahan, tunggulah sampai 5 menit dan matikan AA1, kemudian ulangi langkah2 tadi.
Read More

Perbarui perangkat lunak iOS di iPhone, iPad, dan iPod touch

Pelajari cara memperbarui perangkat iOS secara nirkabel atau menggunakan iTunes.
Pembaruan perangkat lunak iOS memperkenalkan fitur baru yang membuat Anda dapat melakukan lebih banyak hal dengan iPhone, iPad, atau iPod touch. Pastikan Anda selalu memperbarui perangkat Anda agar tidak melewatkan fitur-fitur terbaru.

Sebelum memperbarui

Cadangkan perangkat Anda ke iCloud atau iTunes.
Jika Anda menggunakan Hotspot Pribadi perangkat untuk koneksi Internet komputer, perbarui perangkat secara nirkabel atau hubungkan komputer ke jaringan lain.

Memperbarui perangkat secara nirkabel

Cara paling mudah untuk memperbarui perangkat adalah secara nirkabel, juga disebut “melalui udara”. Berikut caranya:
  1. Colokkan perangkat ke sumber daya.
  2. Ketuk Pengaturan > Umum > Pembaruan Perangkat Lunak.
    Layar Pembaruan Perangkat Lunak di iOS
  3. Ketuk Unduh dan Instal. Pembaruan mungkin akan diunduh secara otomatis saat perangkat terhubung ke Wi-Fi dan sumber listrik.
  4. Ketuk Instal, atau ketuk Nanti untuk menginstal pembaruan nanti. Jika Anda menggunakan kode sandi, Anda perlu memasukkannya sebelum menginstal pembaruan.
    Instal atau nanti
Jika Anda memiliki ruang kosong, tetapi tidak cukup untuk memperbarui melalui udara, Anda dapat memperbarui menggunakan iTunes atau menghapus konten secara manual dari perangkat. Apakah Anda menggunakan iTunes atau memperbarui melalui udara, Anda akan memiliki jumlah ruang kosong yang sama di perangkat setelah diperbarui.
Beberapa pembaruan perangkat lunak iOS tidak tersedia sebagai pembaruan secara nirkabel. Koneksi VPN atau proksi mungkin membuat perangkat tidak dapat menghubungi server pembaruan iOS.

Memperbarui perangkat menggunakan iTunes

Jika Anda tidak dapat memperbarui secara nirkabel, atau jika Anda ingin memperbarui dengan iTunes, ikuti langkah-langkah ini:
  1. Menginstal iTunes versi terbaru di komputer.
  2. Hubungkan perangkat dengan komputer.
  3. Di iTunes, pilih perangkat.
  4. Di panel Ringkasan, klik Periksa Pembaruan.
  5. Klik Unduh dan Perbarui.
Jika Anda tidak memiliki ruang kosong cukup untuk memperbarui menggunakan iTunes, Anda perlumenghapus konten secara manual dari perangkat.
Cari tahu apa yang harus dilakukan jika Anda mendapatkan pesan kesalahan lain saat memperbarui perangkat.
Read More

Cara Root Oppo Joy R1001 Dengan Mudah

Oppo adalah Pabrikan Smartphone yang bisa dibilang masih muda dibidang android, Pabrikan yang satu ini cukup menyita perhatian pecinta android tanah air karena hape hape yang mereka keluarkan sangat bekelas meski masih status rootkie atau pendatang baru nah untuk kesempatan ini yang akan saya bahas adalah cara rooting atau membongkar akses superuser pada oppo joy R1001 ini

Step By Step Rooting Oppo Joy R1001
Pertama yang harus anda siapkan adalah mengaktifkan USB debugging pada oppo joy anda untuk caranya pertama bukan settingan/Pengaturan lalau bukaaboutphone/tentang ponsel lalu klik more dan klik build number beberapa kali hingga nanti ada tulisan developer terbuka
Kembali kesettingan lalu cari developer opions lalu centan USB Debuggin kalau bingung bisa lihat gambar dibawah ini.


Cara Mengaktifkan Developer Options Oppo Joy

Cara mengaktifkan USB debuggin pada developer
Option


Setelah USB debuggin telah di centang atau diceklis kita lanjut langkah langkah rooting pada oppo joy R1001 simpan file yang Root master.apk yang telah didownload dibawah lalu instal dan buka kemudian biarakan root master berjalan jika nanti ada pilihan Mulai Root klik aja dan biarkan Root master bejaan nanti ada lagi dua pilihan klik saja yang kiri dan restar oppo joy anda lalu coba dicek apakah SuperSu/Superuser atau KingUser sudah muncul pada menu aplikasi oppo joy atau belum kalau sudah muncul berarti sudah berhasil root dan coba di cek menggunakan Root Chek download diplaystore.

Demikian tadi cara root oppo Joy r1001 Semoga mudah difahami dan anda tidak bingun kalau anda bingun bisa buka jasa kami pada menu bar diatas tapi masih melalai daerah bandung.
Read More

Lorde

Twitter Feed

Facebook Page

© Romeo Nusantara All rights reserved | Designed By Blogger Templates